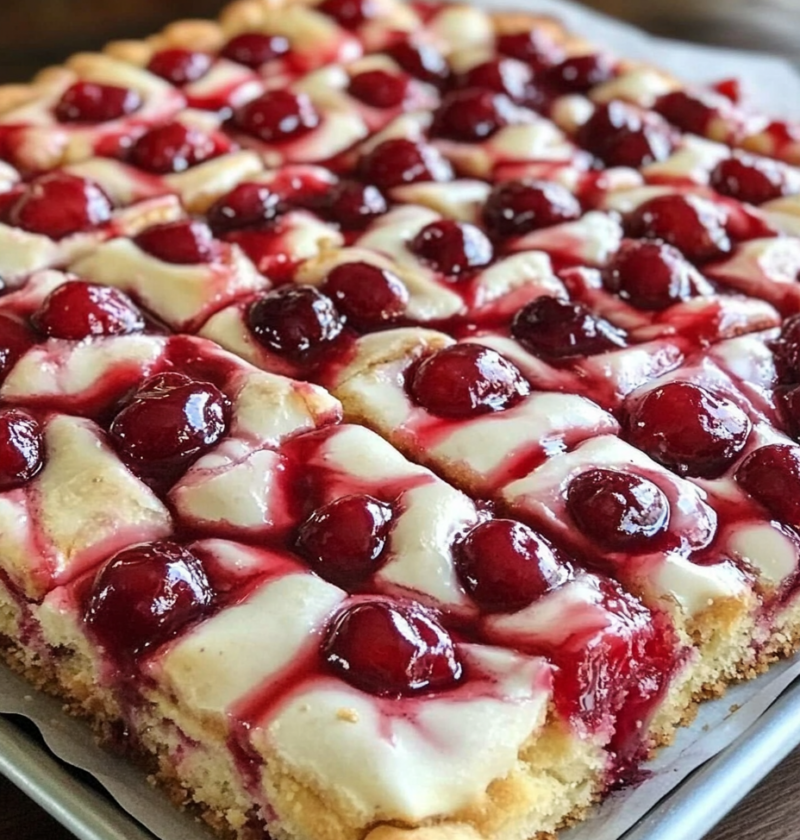
Cherry Bars are the quintessential dessert—perfectly sweet, a little tart, and incredibly satisfying. With a buttery crust, juicy cherry filling, and a sugary glaze, this recipe combines ease with elegance, making it a must-have for your baking repertoire. Whether you’re preparing a treat for a family gathering, holiday party, or a simple weeknight indulgence, Cherry Bars deliver on all fronts. This 800-word guide will take you through the steps to create a dessert that’s as delicious as it is beautiful.
Why Cherry Bars Are a Favorite
- Simplicity Meets Sophistication: With minimal prep and everyday ingredients, this dessert is deceptively easy while looking bakery-worthy.
- Versatile Appeal: Cherry Bars are a crowd-pleaser, with options for customization that fit any occasion.
- Perfectly Balanced Flavor: The buttery crust and tart cherries create a harmonious balance that isn’t overly sweet.
Ingredients for Cherry Bars
For the Crust and Bars
- 1 cup unsalted butter, softened
- 1 ¾ cups granulated sugar
- 1 teaspoon vanilla extract
- 4 large eggs
- 3 cups all-purpose flour
- 1 teaspoon baking powder
- 1 can (21 oz) cherry pie filling
For the Glaze
- 1 cup powdered sugar
- 2–3 tablespoons milk
- ½ teaspoon vanilla extract
Step-by-Step Instructions
1. Prepare Your Workspace
Preheat your oven to 350°F (175°C). Grease a 9×13-inch baking dish or line it with parchment paper for effortless cleanup.
2. Cream Butter and Sugar
In a large mixing bowl, beat the butter and sugar together until light and fluffy. Add the vanilla extract, then beat in the eggs one at a time, ensuring each is fully incorporated.
3. Combine Dry Ingredients
In a separate bowl, whisk together the flour and baking powder. Gradually add this mixture to the wet ingredients, mixing until a soft dough forms.
4. Layer the Dough and Filling
Spread two-thirds of the dough evenly into your prepared baking dish. Top with the cherry pie filling, spreading it out to create an even layer. Drop small spoonfuls of the remaining dough over the cherries, allowing bits of filling to peek through.
5. Bake to Perfection
Bake the bars for 35–40 minutes or until the crust is golden brown and set. Allow the dessert to cool completely in the pan before glazing.
6. Make the Glaze
In a small bowl, whisk together powdered sugar, milk, and vanilla extract. Adjust the milk for your desired glaze consistency—thick for a rich topping or thin for a light drizzle.
7. Glaze and Slice
Drizzle the glaze over the cooled bars. Once set, use a sharp knife to cut into squares or rectangles.
Cooking Tips and Tricks
- Homemade Cherry Filling: If you prefer a more homemade touch, make your cherry filling using fresh or frozen cherries. Combine them with sugar and a bit of cornstarch to thicken.
- Parchment Paper Lining: Use parchment paper to line your pan for easy removal and cleaner cuts.
- Storage: Store Cherry Bars in an airtight container at room temperature for up to three days or refrigerate for up to a week.
Variations to Try
1. Mixed Berry Bars
Substitute cherry pie filling with a mix of berry fillings like blueberry, raspberry, or blackberry for a colorful twist.
2. Chocolate Cherry Bars
Fold in ½ cup of mini chocolate chips into the dough or sprinkle on top before baking for a decadent touch.
3. Nut Lovers’ Delight
Add a sprinkle of chopped almonds, pecans, or walnuts over the cherry filling for added texture and flavor.
4. Gluten-Free Cherry Bars
Use a 1:1 gluten-free flour substitute for the crust to make these bars accessible to everyone.
FAQs About Cherry Bars
1. Can I freeze Cherry Bars?
Yes! Wrap individual bars tightly in plastic wrap, then place them in a freezer-safe container. Freeze for up to three months. Thaw at room temperature before serving.
2. Can I use fresh cherries instead of canned pie filling?
Absolutely! Cook fresh or frozen cherries with sugar and cornstarch to create a homemade filling.
3. How do I get clean cuts when slicing the bars?
Use a sharp knife, and clean it with a damp cloth between cuts to achieve perfect squares or rectangles.
4. What’s the best way to store Cherry Bars?
Store them in an airtight container. Keep them at room temperature for up to three days or refrigerate for longer freshness.
Why Cherry Bars Are Perfect for Any Occasion
Cherry Bars are not only a treat for the taste buds but also a feast for the eyes. They transition seamlessly from casual gatherings to formal celebrations, ensuring you always have a reliable dessert in your arsenal. The tartness of cherries combined with the buttery crust creates a flavor profile that’s impossible to resist.
Whether you’re baking for a party, a potluck, or just a quiet evening at home, Cherry Bars are the answer to your dessert dreams. With their balance of flavors and ease of preparation, they’ll quickly become a family favorite.
So, preheat your oven, gather your ingredients, and treat yourself to the magic of Cherry Bars. You deserve it


