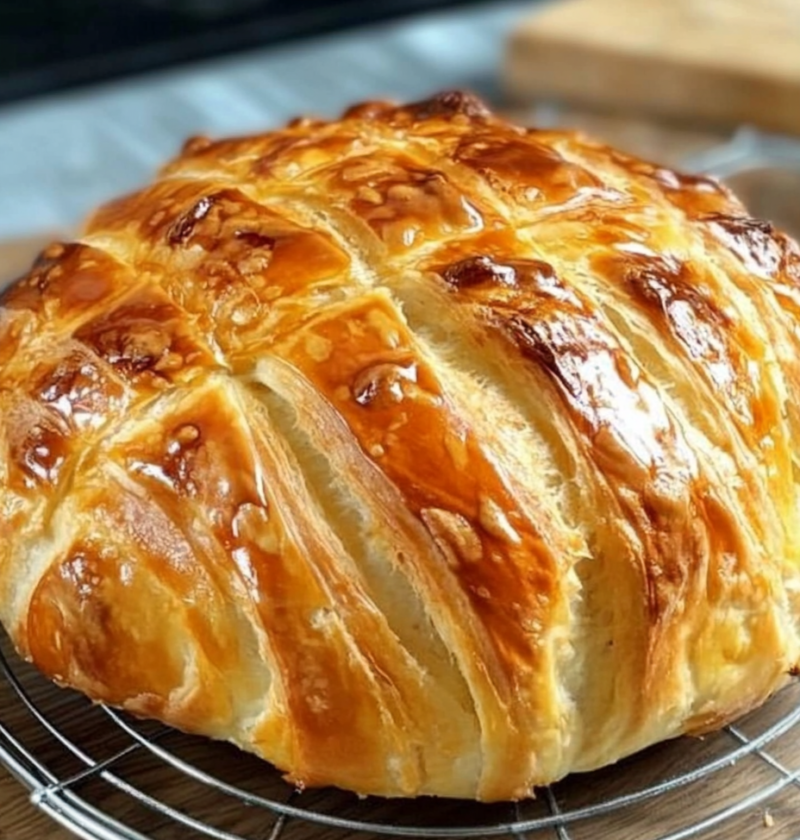
If you’re a fan of artisan-style bread with a golden, crunchy crust and a soft, airy interior, this recipe is perfect for you. With just a few simple ingredients and some patience, you can create bakery-quality bread in your kitchen.
Ingredients
- 3 cups all-purpose flour (or bread flour for extra chewiness)
- 1 teaspoon salt
- 1 teaspoon sugar
- 1 packet (2 ¼ teaspoons) active dry yeast
- 1 ¼ cups warm water (110°F / 43°C)
- 1 tablespoon olive oil (optional, for added richness)
Instructions
Step 1: Activate the Yeast
In a small bowl, combine warm water, sugar, and yeast. Stir gently and let it sit for 5–10 minutes until it becomes frothy. This ensures the yeast is active.
Step 2: Mix the Dough
In a large mixing bowl, combine the flour and salt. Make a well in the center and pour in the yeast mixture. Add olive oil, if using. Mix until a shaggy dough forms.
Step 3: Knead the Dough
Turn the dough onto a lightly floured surface. Knead for about 8–10 minutes until it’s smooth and elastic. Alternatively, use a stand mixer with a dough hook for 5–7 minutes.
Step 4: First Rise
Place the dough in a lightly oiled bowl, cover with a damp cloth or plastic wrap, and let it rise in a warm place for 1–2 hours, or until it doubles in size.
Step 5: Shape the Dough
Punch down the dough and shape it into a round or oval loaf. Place it on a parchment-lined baking sheet or in a floured proofing basket (if you have one) for rustic shape.
Step 6: Second Rise
Cover the dough with a clean kitchen towel and let it rise for another 30–40 minutes until it’s slightly puffed.
Step 7: Preheat the Oven
Preheat your oven to 450°F (230°C). Place a baking stone or sheet on the middle rack and a metal pan on the bottom rack. Let the oven heat for at least 30 minutes.
Step 8: Score and Bake
Make a few shallow cuts on the surface of the dough with a sharp knife or bread lame to allow steam to escape. Transfer the dough onto the hot baking stone or sheet. Quickly pour 1 cup of hot water into the pan on the bottom rack to create steam. Close the oven door immediately.
Step 9: Bake to Perfection
Bake for 25–30 minutes or until the crust is deep golden brown and sounds hollow when tapped. For an extra-crispy crust, turn off the oven and leave the bread inside for 5 more minutes with the door slightly ajar.
Step 10: Cool and Enjoy
Let the bread cool on a wire rack for at least 1 hour before slicing. This helps the interior set properly.
Tips for a Perfect Hard Crust
- Steam is Key: Creating steam in the oven is essential for a hard, crackly crust. If you don’t have a metal pan, mist the dough with water before baking.
- High Heat: Bake at a high temperature to achieve the ideal crust texture.
- Use a Dutch Oven: Baking in a preheated Dutch oven traps steam naturally, giving professional results.
- Flour Selection: Bread flour yields chewier bread, while all-purpose flour is slightly softer.
Variations
- Seeded Crust: Before baking, brush the dough with water and sprinkle with sesame seeds, poppy seeds, or sunflower seeds for added flavor and texture.
- Herb-Infused: Mix dried herbs like rosemary or thyme into the dough for an aromatic loaf.
- Whole Wheat Version: Substitute up to 50% of the flour with whole wheat flour for a hearty twist.
Frequently Asked Questions (FAQs)
1. Can I use instant yeast instead of active dry yeast?
Yes, use the same amount, but skip the activation step. Add it directly to the dry ingredients.
2. How do I store the bread?
Store at room temperature in a paper bag for 2–3 days. Avoid plastic bags as they soften the crust.
3. Can I freeze this bread?
Absolutely! Wrap it tightly in plastic wrap and aluminum foil, then freeze for up to 3 months. Reheat in the oven for a freshly baked feel.
4. What if I don’t have a baking stone?
A preheated baking sheet works well as a substitute.
5. How do I ensure an airy crumb?
Avoid over-kneading, let the dough rise sufficiently, and handle it gently when shaping.
Making hard crust bread at home is not only rewarding but also simpler than you might think. With the right techniques and a bit of patience, you can achieve a loaf that rivals any artisan bakery. Serve it with soups, spreads, or enjoy it on its own for a satisfying crunch in every bite