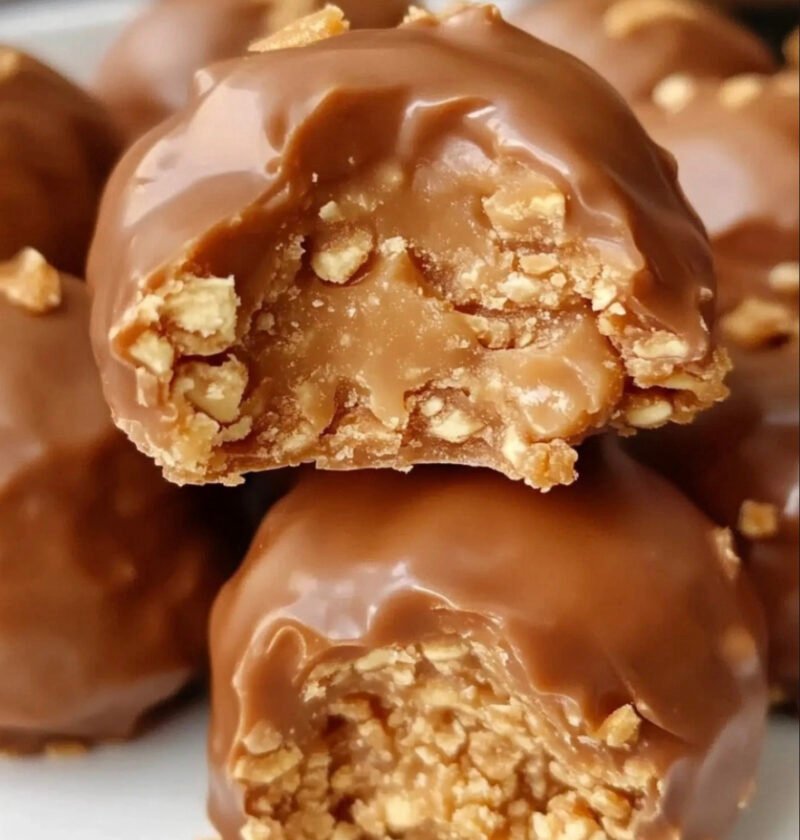
Butterfinger Balls are a decadent no-bake treat that combines the crunchy, peanut-buttery goodness of Butterfinger candy with creamy peanut butter and chocolate. These bite-sized delights are perfect for parties, holiday gatherings, or anytime you crave a sweet indulgence.
Ingredients
- 2 cups crushed Butterfinger candy bars
- 1 cup creamy peanut butter
- 1 cup powdered sugar
- 1 teaspoon vanilla extract
- 2 cups milk chocolate chips or melting chocolate
- 1 tablespoon coconut oil (optional, for smoother chocolate coating)
Instructions
Step 1: Crush the Butterfinger Bars
Place the Butterfinger candy bars in a zip-top bag and use a rolling pin to crush them into fine crumbs. You can also use a food processor for a finer texture.
Step 2: Make the Peanut Butter Mixture
In a large mixing bowl, combine the crushed Butterfinger bars, creamy peanut butter, powdered sugar, and vanilla extract. Mix until the ingredients are well incorporated and form a dough-like consistency.
Step 3: Shape the Balls
Scoop out about a tablespoon of the mixture and roll it into a ball using your hands. Place the formed balls onto a parchment-lined baking sheet. Repeat until all the mixture is used. Chill the balls in the refrigerator for 30 minutes to firm up.
Step 4: Melt the Chocolate
In a microwave-safe bowl, melt the chocolate chips in 30-second increments, stirring after each interval, until smooth. Add coconut oil if using for a glossy finish. Alternatively, melt the chocolate in a double boiler.
Step 5: Dip the Balls
Using a fork or a dipping tool, carefully dip each chilled Butterfinger ball into the melted chocolate, ensuring it is fully coated. Allow any excess chocolate to drip off before placing the ball back onto the parchment-lined baking sheet.
Step 6: Set the Coating
Once all the balls are coated, refrigerate them for another 30 minutes or until the chocolate is fully set.
Step 7: Serve and Enjoy
Transfer the Butterfinger Balls to a serving plate and enjoy! Store leftovers in an airtight container in the refrigerator for up to one week.
Cooking Notes
- Candy Bar Alternatives: If Butterfinger isn’t available, try using other crunchy peanut butter-based candy bars like Reese’s or Heath bars.
- Chocolate Options: Use white chocolate, dark chocolate, or semi-sweet chocolate for different flavor variations.
- Add Toppings: Sprinkle crushed Butterfinger crumbs or drizzle melted white chocolate over the balls before the coating sets for added flair.
Variations
- Peanut-Free Option: Substitute peanut butter with almond butter, sunflower seed butter, or cookie butter.
- Holiday Version: Decorate the chocolate coating with festive sprinkles or edible glitter to match the occasion.
- Keto-Friendly Option: Use sugar-free chocolate and keto-friendly candy to make this recipe low-carb.
Frequently Asked Questions (FAQs)
Can I freeze Butterfinger Balls?
Yes! Store them in an airtight container or freezer bag and freeze for up to 3 months. Thaw in the refrigerator before serving.
Can I make these ahead of time?
Absolutely! Butterfinger Balls can be prepared a day or two in advance and stored in the refrigerator until serving.
Can I use natural peanut butter?
Natural peanut butter can be used, but make sure to stir it well to avoid separation, as the oil may make the mixture harder to work with.
How many servings does this recipe make?
This recipe yields about 24 balls, depending on the size you make them.
Butterfinger Balls are an easy and delicious treat that satisfies your sweet tooth with minimal effort. Perfect for gifting, snacking, or adding to a dessert spread, these no-bake bites are guaranteed to be a hit. Whip up a batch today and enjoy the perfect combination of peanut butter, chocolate, and crunchy candy goodness!