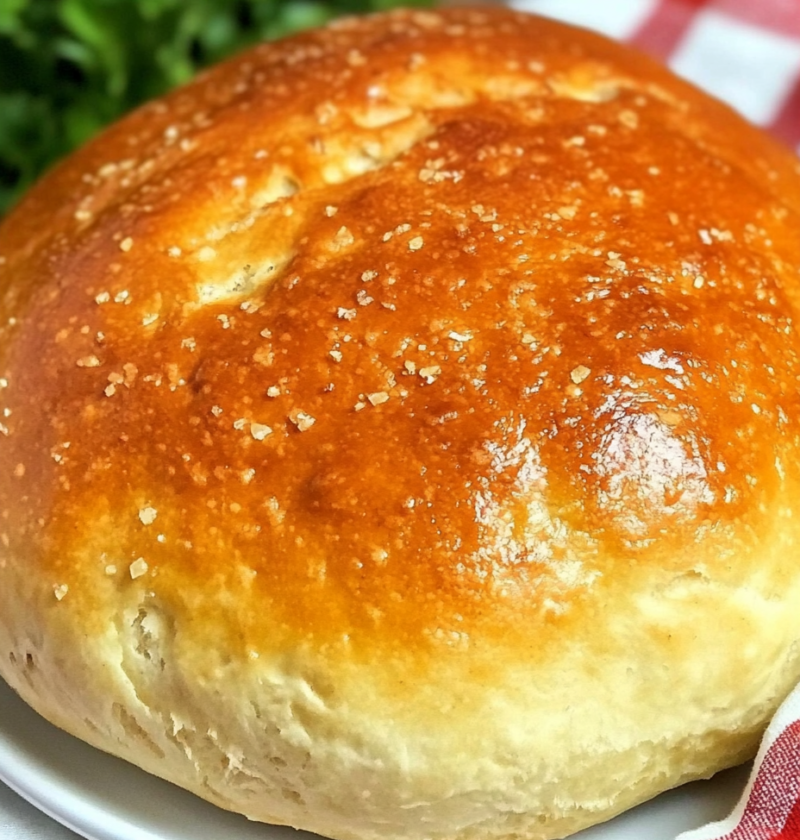
If you’ve ever wanted to make homemade bread but didn’t want to deal with complicated kneading or an oven, this Crockpot Bread recipe is for you! This method gives you a soft, fluffy interior with a lightly golden crust, all without using a traditional oven.
Why Make Bread in a Crockpot?
✔ No oven required – Perfect for hot days when you don’t want to heat up your kitchen.
✔ Beginner-friendly – No need for fancy techniques or a bread machine.
✔ Soft and delicious – A moist and tender crumb with a lightly crisp crust.
✔ Customizable – Add herbs, cheese, or even cinnamon and sugar for different flavors.
Ingredients
- 3 cups (375g) all-purpose flour or bread flour
- 1 packet (2 ¼ teaspoons) active dry yeast
- 1 ¼ cups warm water (100°F–110°F)
- 1 tablespoon sugar or honey
- 1 teaspoon salt
- 1 tablespoon olive oil or melted butter
(Optional add-ins: 1 teaspoon dried rosemary, ¼ cup shredded cheese, or 1 teaspoon garlic powder for extra flavor!)
How to Make Crockpot Bread
Step 1: Activate the Yeast
- In a small bowl, mix the warm water, sugar (or honey), and yeast.
- Let it sit for 5–10 minutes until it becomes foamy. (If it doesn’t foam, your yeast may be expired!)
Step 2: Make the Dough
- In a large mixing bowl, combine the flour and salt.
- Pour in the yeast mixture and olive oil. Stir with a wooden spoon or mix with your hands until a shaggy dough forms.
- Transfer the dough to a lightly floured surface and knead for 5 minutes until smooth and elastic. (You can also use a stand mixer with a dough hook for 3 minutes.)
Step 3: First Rise
- Place the dough in a greased bowl, cover with a kitchen towel, and let it rise in a warm place for 1 hour, or until it doubles in size.
Step 4: Shape & Cook in the Crockpot
- Punch down the dough and shape it into a round loaf.
- Line the bottom of your Crockpot with parchment paper to prevent sticking.
- Place the dough in the Crockpot, cover with the lid, and set it to HIGH.
- Cook for 2–2½ hours, until the bread is firm and the top is set.
Step 5: Crisp the Crust (Optional but Recommended!)
- To get a golden, crispy crust, place the cooked bread under a broiler for 3–5 minutes.
- Let it cool for at least 15 minutes before slicing
Tips for the Best Crockpot Bread
✔ Use fresh yeast – Old yeast won’t make the bread rise properly.
✔ Don’t skip the first rise – This step is essential for soft, fluffy bread.
✔ Line your Crockpot – Parchment paper prevents sticking and makes cleanup easy.
✔ Use a broiler for a crispy crust – The Crockpot doesn’t brown the top, so finishing in the oven gives it that perfect golden crust.
✔ Try different flours – Whole wheat flour works, but mix it with white flour for a softer texture.
Flavor Variations
🌿 Herb & Garlic Bread – Add 1 teaspoon dried rosemary and ½ teaspoon garlic powder.
🧀 Cheesy Bread – Mix in ¼ cup shredded cheddar or Parmesan before shaping the dough.
🍯 Sweet Honey Bread – Replace sugar with honey and add ½ teaspoon cinnamon.
Serving Ideas
🥖 Serve warm with butter & jam for breakfast.
🍲 Pair with soups and stews for a hearty meal.
🧀 Use for grilled cheese sandwiches.
🥪 Slice for homemade sandwiches.
Storage & Reheating
Storing:
- Keep at room temperature in an airtight container for 2–3 days.
- Freeze for up to 3 months (slice before freezing for easy use).
Reheating:
- Toast in a skillet with butter for a crispy edge.
- Warm in a microwave for 15–20 seconds.
Frequently Asked Questions
Can I make this gluten-free?
Yes! Use a gluten-free all-purpose flour blend and add 1 teaspoon xanthan gum for structure.
Do I need a Dutch oven?
No! The Crockpot works like a Dutch oven, trapping steam for a soft texture.
Why isn’t my bread rising?
- Your yeast may be expired – check the date!
- The water was too hot or too cold – yeast activates best at 100°F–110°F.
- The dough needs more time to rise – place it in a warm spot.
Final Thoughts
Making bread in a Crockpot is a game-changer! It’s easy, foolproof, and perfect for beginners. Give it a try, and let me know how it turns out!


