Introduction
Welcome to the world of homemade Challah bread! In this article, we will explore the art of making this traditional Jewish bread that is not only delicious but also deeply meaningful in various cultures. Whether you are a seasoned baker or a beginner looking to embark on a culinary adventure, this Challah bread recipe is sure to delight your taste buds and fill your home with the warm aroma of freshly baked bread.
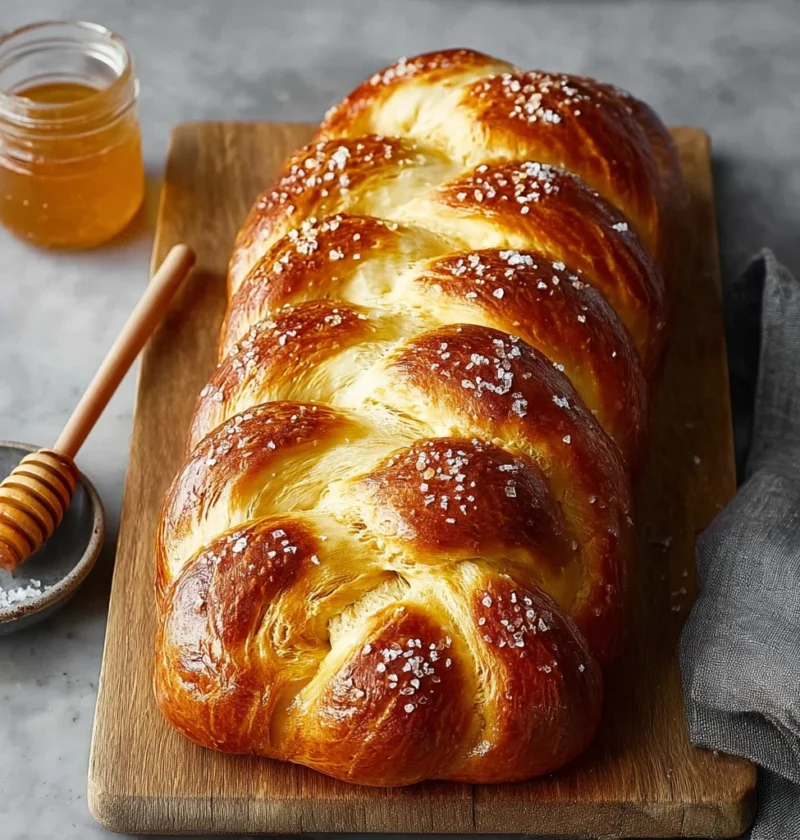
Challah bread holds a special place in many hearts due to its rich history and significance in Jewish traditions. The process of braiding the dough symbolizes unity and the cycle of life, making it a meaningful addition to any festive table. Beyond its cultural importance, Challah bread is loved for its soft texture, slightly sweet flavor, and versatility in both sweet and savory dishes.
Join us on this journey as we unravel the secrets behind making the perfect Challah bread from scratch. From mixing the ingredients to braiding the dough, each step is a labor of love that will result in a beautiful loaf that you can proudly share with family and friends.
Get ready to roll up your sleeves, dust your hands with flour, and let the magic of baking unfold as we dive into the world of homemade Challah bread.
Why You’ll Love This Recipe
There are several reasons why you’ll fall in love with this homemade Challah bread recipe. Firstly, the process of making Challah bread is incredibly therapeutic and rewarding. Kneading the dough by hand allows you to connect with the ingredients on a deeper level, resulting in a loaf that is infused with care and attention.
Additionally, Challah bread is incredibly versatile. You can enjoy it fresh out of the oven with a dollop of butter, use it to make indulgent French toast, or even turn it into a savory sandwich. The possibilities are endless, making Challah bread a staple in any kitchen.
For those with dietary preferences, this recipe can easily be adapted to suit various needs. Whether you prefer whole wheat flour, gluten-free alternatives, or want to experiment with different toppings, Challah bread is a canvas waiting for your creative touch.
Prepare to be amazed by the softness, flavor, and homemade charm of this Challah bread recipe that will soon become a beloved favorite in your household.
Ingredients
For this homemade Challah bread recipe, you will need the following ingredients:
– 4 cups all-purpose flour
– 1/4 cup granulated sugar
– 1 packet active dry yeast
– 1 cup warm water
– 2 eggs
– 1/4 cup vegetable oil
– 1 teaspoon salt
– Optional: sesame seeds, poppy seeds, or flaky sea salt for topping
Feel free to experiment with different types of flour or sweeteners to suit your preferences. You can also customize the toppings to add a personal touch to your Challah bread.
Step-by-Step Instructions
Follow these simple steps to create your homemade Challah bread:
1. Prepare the Dough
In a large mixing bowl, combine the warm water, sugar, and yeast. Let it sit for about 5-10 minutes until frothy.
Once the yeast is activated, add one beaten egg, vegetable oil, and salt to the mixture. Gradually stir in the flour until a soft dough forms.
Knead the dough on a floured surface for about 8-10 minutes until it becomes smooth and elastic.
Place the dough in a greased bowl, cover it with a clean kitchen towel, and let it rise in a warm place for about 1-2 hours or until doubled in size.
2. Shape the Challah
Punch down the dough and divide it into three equal parts.
Roll each part into a long rope, about 16 inches in length.
Pinch the ends of the ropes together at the top and braid them, tucking the ends under the loaf.
Place the braided Challah on a baking sheet lined with parchment paper.
3. Final Rise and Bake
Cover the Challah with a kitchen towel and let it rise for another 30-45 minutes.
Preheat your oven to 350°F (175°C).
Beat the remaining egg and brush it over the Challah. Sprinkle with your choice of toppings.
Bake the Challah for 25-30 minutes or until golden brown and hollow-sounding when tapped on the bottom.
Expert Tips for Success
For best results when making Challah bread:
– Use warm water to activate the yeast, but not too hot to avoid killing it.
– Ensure the dough is well-kneaded for a soft and fluffy texture.
– Let the dough rise in a warm, draft-free place to encourage fermentation.
– Brushing the Challah with egg wash will give it a shiny, golden crust.
Variations and Substitutions
Feel free to get creative with your Challah bread by:
– Adding raisins or dried fruits to the dough for a sweet twist.
– Swapping out some of the all-purpose flour for whole wheat flour for a nuttier flavor.
– Experimenting with different braiding techniques to create unique shapes.
– Using honey or maple syrup as a natural sweetener instead of sugar.
Serving Suggestions
Once your Challah bread is baked to perfection, serve it warm with a spread of honey butter or alongside a bowl of savory soup. For a special treat, use slices of Challah to make decadent French toast topped with fresh berries and a drizzle of maple syrup.
Pair your Challah bread with a cup of hot tea, a glass of chilled white wine, or a refreshing fruit salad for a delightful meal that will satisfy your cravings and impress your guests.
FAQs
How long does Challah bread stay fresh?
Store your Challah bread in a paper bag or bread box at room temperature for up to 2-3 days. You can also freeze it for longer shelf life and reheat slices in the oven or toaster when ready to enjoy.
Can I make Challah bread ahead of time?
Absolutely! You can prepare the dough in advance, let it rise in the refrigerator overnight, then shape and bake it the next day for fresh Challah bread in the morning.
Why is my Challah bread dough too sticky?
If your dough is too sticky, gradually add more flour until it reaches the right consistency. The amount of flour needed can vary depending on factors like humidity and flour type.
Final Thoughts
Homemade Challah bread is more than just a recipe; it is a journey of tradition, craftsmanship, and love. By following this guide and infusing your personal touch, you can create a loaf of Challah bread that not only tastes divine but also carries the essence of your kitchen.
So, gather your ingredients, set aside some time for baking, and immerse yourself in the joy of creating something truly special. Whether you bake Challah bread for a holiday celebration, a weekend brunch, or simply to enjoy a quiet moment in your day, the experience of making this bread will undoubtedly leave a lasting impression on your culinary repertoire.
Embrace the process, savor the aroma, and share the joy of homemade Challah bread with those around you. Happy baking!