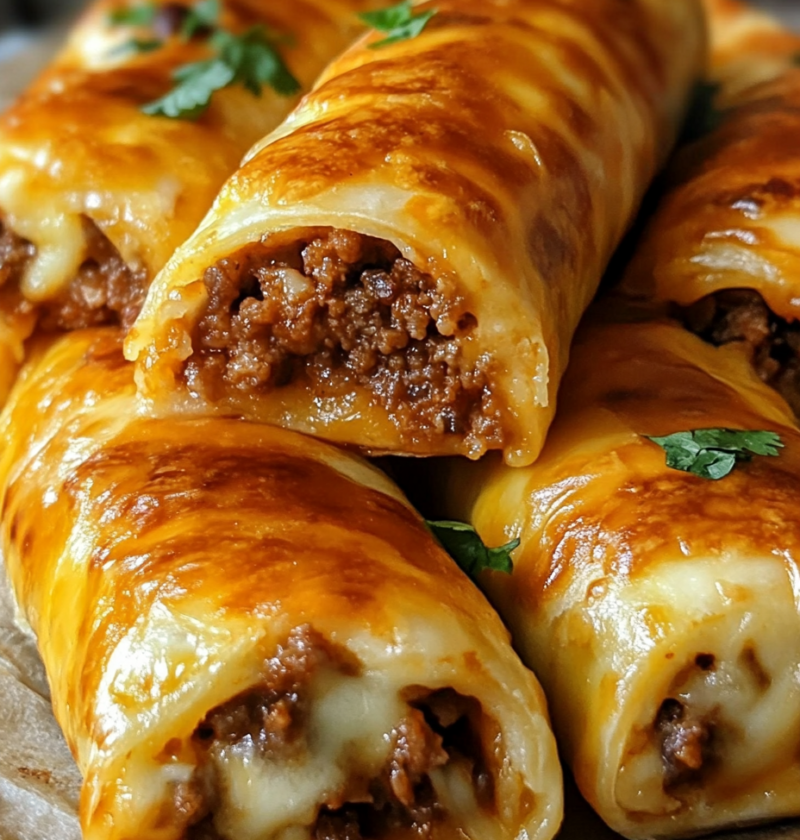
Looking for a quick, crowd-pleasing snack or a family-friendly dinner idea? Cheesy Taco Sticks are the perfect combination of bold taco flavors, gooey cheese, and soft, buttery dough. These handheld delights are ideal for parties, game days, or even a fun weeknight meal. They’re easy to make, deliciously cheesy, and utterly addictive.
Ingredients
For the Taco Sticks:
- 1 lb ground beef
- 1 packet taco seasoning (or 2 tablespoons homemade taco seasoning)
- 2/3 cup water
- 1 tube refrigerated pizza dough
- 1 ½ cups shredded Mexican blend cheese (or your favorite cheese)
- 1 cup shredded cheddar cheese (optional for extra cheesiness)
For the Topping:
- 2 tablespoons butter, melted
- 1 teaspoon garlic powder
- 1 teaspoon dried parsley
- 1/4 cup grated Parmesan cheese
Optional Dipping Sauces:
- Salsa
- Guacamole
- Sour cream
Instructions
Step 1: Prepare the Taco Filling
- In a skillet over medium heat, cook the ground beef until browned and fully cooked, breaking it into crumbles as it cooks.
- Drain excess grease, then stir in the taco seasoning and water. Simmer for 3–5 minutes, or until the mixture thickens. Remove from heat and let cool slightly.
Step 2: Roll Out the Dough
- Preheat your oven to 375°F (190°C) and line a baking sheet with parchment paper.
- Roll out the refrigerated pizza dough onto a lightly floured surface. Cut the dough into 10 even rectangles.
Step 3: Assemble the Taco Sticks
- Place about 1–2 tablespoons of the taco meat onto one half of each rectangle, leaving space around the edges.
- Add a generous sprinkle of shredded Mexican blend cheese on top of the taco meat.
- Fold the other half of the dough over the filling, then pinch and seal the edges tightly to prevent the cheese from oozing out during baking.
- Place the assembled sticks on the prepared baking sheet, seam-side down.
Step 4: Add the Topping
- In a small bowl, mix the melted butter, garlic powder, and dried parsley. Brush the mixture generously over each taco stick.
- Sprinkle grated Parmesan cheese on top for an extra flavor boost.
Step 5: Bake the Taco Sticks
- Bake in the preheated oven for 12–15 minutes, or until the dough is golden brown and cooked through.
- Remove from the oven and let cool for a few minutes before serving.
Serving Suggestions
- Serve warm with salsa, guacamole, and sour cream for dipping.
- Pair with a simple side salad or Mexican rice for a complete meal.
Cooking Notes
- Make It Spicier: Add diced jalapeños or a sprinkle of cayenne pepper to the taco meat for a spicy kick.
- Prevent Leaks: Ensure the edges are tightly sealed by pressing firmly with your fingers or a fork.
- Customizable Fillings: Try adding black beans, corn, or diced bell peppers for extra flavor and texture.
Variations
- Vegetarian Option: Replace the ground beef with seasoned black beans or crumbled tofu for a vegetarian-friendly version.
- Breakfast Taco Sticks: Swap the ground beef for scrambled eggs and breakfast sausage for a morning twist.
- Gluten-Free Version: Use gluten-free pizza dough to accommodate dietary restrictions.
FAQs
1. Can I make these ahead of time?
Yes! You can assemble the taco sticks and store them in the refrigerator for up to 24 hours before baking. When ready, bake as directed.
2. Can I freeze taco sticks?
Absolutely! Freeze the assembled sticks on a baking sheet until firm, then transfer them to a freezer-safe bag. Bake from frozen at 375°F (190°C) for 15–18 minutes.
3. Can I use other types of dough?
Yes, crescent roll dough or even homemade pizza dough can be used for this recipe. Adjust the baking time as needed.
Cheesy Taco Sticks are a fun, flavorful, and easy-to-make recipe that’s guaranteed to impress. Whether you’re hosting a party, feeding a hungry family, or just craving something delicious, these taco sticks are a surefire hit. With their golden, buttery crust, gooey cheese, and savory taco filling, they’re a handheld snack you’ll want to make again and again.
Give this recipe a try, and don’t forget to pair it with your favorite dips for the ultimate experience. Enjoy