Are you ready to indulge in a refreshing and delightful treat this summer? Look no further than this Creamy Banana Ice Cream. This homemade banana ice cream recipe is not only simple to make, but it also offers a tropical flavor that will transport you straight to the sunny beaches. Made from ripe bananas for ice cream, it’s the perfect guilt-free dessert to enjoy on a warm day. You can enjoy this dessert straight from the freezer, or you can get creative with toppings and mix-ins to customize each serving, making it a fun project for the whole family!
Ingredients
- Base Ingredients:
- 4 large ripe bananas
- 1 cup coconut milk (or any non-dairy milk for a dairy-free banana dessert)
- 1 tablespoon honey or maple syrup (optional, adjust based on sweetness preference)
- Toppings (optional):
- Chopped nuts (like walnuts or almonds) for crunch and extra nutrition
- Shredded coconut to enhance the tropical flavor profile
- Chocolate chips or cocoa nibs for a decadent touch
- Fresh banana slices to reinforce the banana flavor and for visual appeal
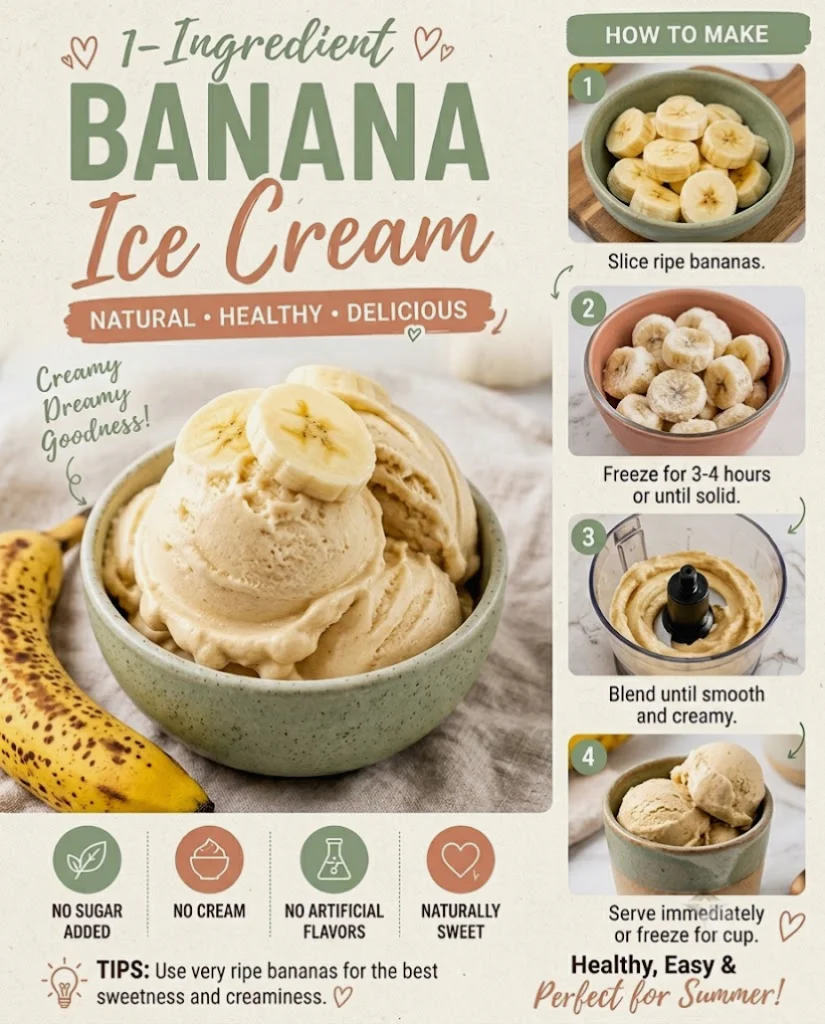
When picking bananas, ensure they are very ripe, as their natural sweetness enhances the overall flavor of the ice cream. Spotting some brown spots on their peel is a good indication of ripeness. If you’re looking for a vegan banana ice cream, the ingredients listed here are perfect, especially with coconut milk as the base. The creaminess of the coconut milk blends beautifully with the bananas. You can learn more about this topic.
Steps / Instructions
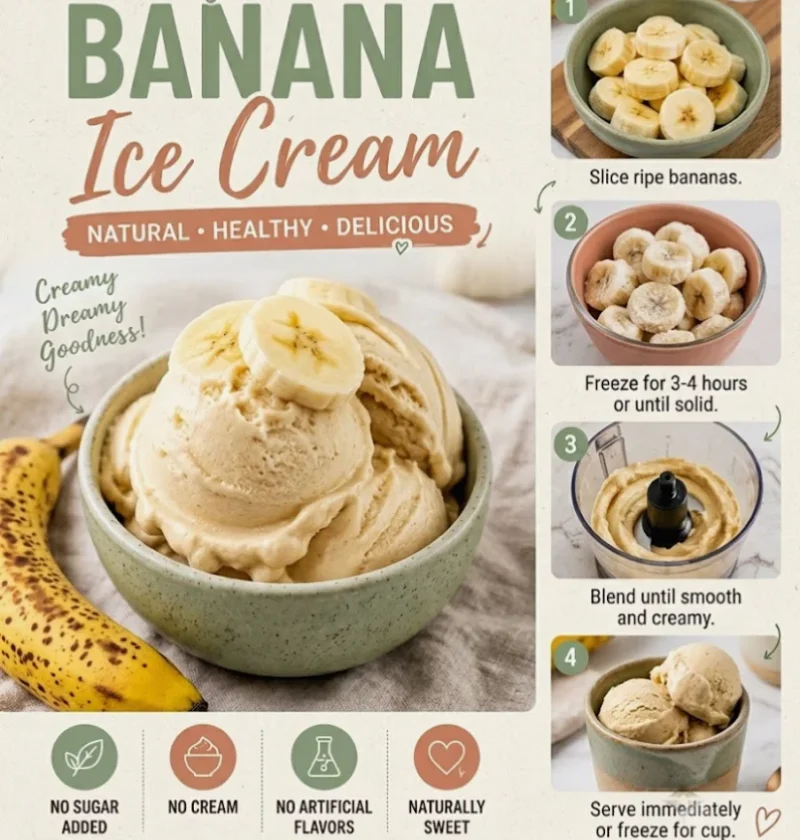
- Prepare the Bananas: Peel and slice the ripe bananas into small pieces, about 1-inch thick. This will help them blend easily and create a smooth texture, which is essential for a creamy end product. The smaller the pieces, the quicker they freeze!
- Blend Ingredients: In a blender or food processor, combine the sliced bananas, coconut milk, and honey or maple syrup. Blend until completely smooth and creamy, stopping to scrape down the sides if necessary. You want a silky-smooth mixture without any lumps for the best Creamy Banana Ice Cream.
- Taste and Adjust: After blending, taste the mixture. If you prefer a sweeter ice cream, add more honey or maple syrup and blend again to incorporate. This step ensures the final product fits your personal taste, making your ice cream truly your own.
- Chill the Mixture: Pour the banana mixture into an airtight container. Cover and place it in the freezer for about 1 hour to thicken slightly. This initial chilling step will help improve the final texture of your ice cream.
- Churn or No-Churn: If you have an ice cream maker, churn according to the manufacturer’s instructions until it reaches a soft-serve consistency. If you do not have a churner, simply leave the mixture in the freezer, stirring every 30 minutes until firm. This method will help keep your ice cream creamy rather than icy.
- Freeze Until Set: Once the ice cream reaches your desired consistency, transfer it back to the airtight container and freeze for an additional 2-4 hours until fully set. This final freezing stage allows the flavors to meld and the texture to solidify.
- Serve: When ready to serve, let the ice cream sit at room temperature for a few minutes to soften slightly. Scoop into bowls and top with your choice of chopped nuts, shredded coconut, or chocolate chips. The toppings can add a delightful contrast in texture and flavor.
This no-churn banana ice cream is perfect for those who want a delicious dessert without the hassle of traditional ice cream making. With just a few simple steps, you can create a delightful frozen banana treat that is sure to impress. The creaminess of this dish makes it a standout choice for gatherings. Check out our related guide for more tips.
Tips & Tricks
- Storage: Store any leftover ice cream in an airtight container in the freezer. It will keep for up to 1 week, although it’s best enjoyed fresh for optimal creaminess. To prevent ice crystals, place a piece of parchment paper directly on the surface of the ice cream before sealing the container.
- Make-Ahead Option: This ice cream can be made in advance and stored in the freezer for a quick and easy summer dessert. Consider portioning it out into smaller containers for easy access during busy days.
- Avoid Ice Crystals: For the creamiest texture, ensure to stir the mixture every 30 minutes during the freezing process if not using an ice cream maker. This step is critical for a smooth texture, as it helps incorporate air and prevents large ice crystals from forming.
- Common Mistakes: Don’t skip the ripeness of bananas. Underripe bananas will not provide the creamy texture and sweetness needed for the best results. Additionally, blending until smooth is crucial to avoid any chunks in the final product, which can detract from the overall experience.
Variations
You can easily customize your creamy fruit desserts by trying different add-ins or flavor combinations:
- For a chocolate twist, add 2 tablespoons of cocoa powder or melted dark chocolate. This will give your ice cream a rich, indulgent flavor.
- Mix in some peanut butter for a rich and indulgent flavor, which pairs wonderfully with the banana.
- Include a handful of spinach or kale for a sneaky way to add nutrients without altering the taste much. These greens can help create a fun green banana ice cream that’s healthy and delicious!
Each variation offers a unique spin on the traditional banana ice cream, making it suitable for various taste preferences. Feel free to experiment with different fruits or spices for even more exciting flavors.
Serving Suggestions
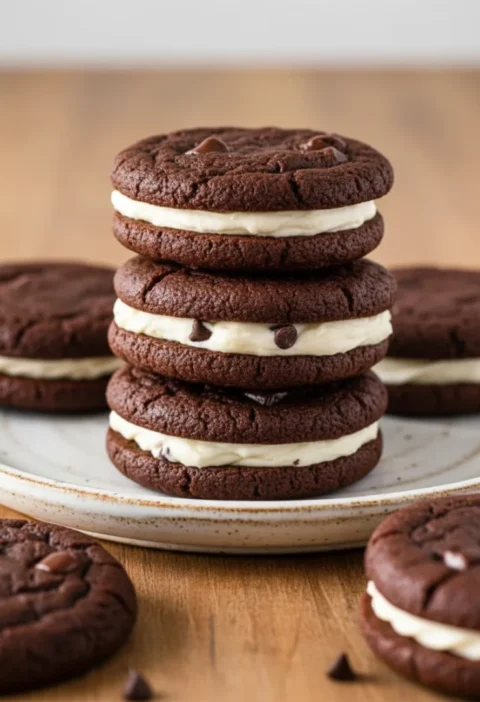
This guilt-free ice cream alternative can be served in bowls, cones, or even between two cookies for an indulgent ice cream sandwich. Pair it with a refreshing summer drink, such as lemonade or coconut water, to complete your experience. Garnishing with fresh fruits or a drizzle of chocolate sauce will elevate your dessert to new heights, turning a simple treat into a gourmet experience.
Creamy Banana Ice Cream
This homemade banana ice cream recipe is not only simple to make, but it also offers a tropical flavor that will transport you straight to the sunny beaches.
Ingredients
- 4 large ripe bananas
- 1 cup coconut milk (or any non-dairy milk for a dairy-free banana dessert)
- 1 tablespoon honey or maple syrup (optional, adjust based on sweetness preference)
- Chopped nuts (like walnuts or almonds) for crunch and extra nutrition (optional)
- Shredded coconut to enhance the tropical flavor profile (optional)
- Chocolate chips or cocoa nibs for a decadent touch (optional)
- Fresh banana slices to reinforce the banana flavor and for visual appeal (optional)
Directions
Peel and slice the ripe bananas into small pieces, about 1-inch thick.
In a blender or food processor, combine the sliced bananas, coconut milk, and honey or maple syrup. Blend until completely smooth and creamy.
After blending, taste the mixture. If you prefer a sweeter ice cream, add more honey or maple syrup and blend again.
Pour the banana mixture into an airtight container. Cover and place it in the freezer for about 1 hour to thicken slightly.
If you have an ice cream maker, churn according to the manufacturer's instructions until it reaches a soft-serve consistency. If not, leave the mixture in the freezer, stirring every 30 minutes until firm.
Once the ice cream reaches your desired consistency, transfer it back to the airtight container and freeze for an additional 2-4 hours until fully set.
When ready to serve, let the ice cream sit at room temperature for a few minutes to soften slightly. Scoop into bowls and top with your choice of toppings.
Nutrition Facts
Recipe Reviews
- ★★★★★
Excellent recipe!
Leave a Reply
Your email address will not be published. Required fields are marked *


Excellent recipe!