Introduction
Welcome to a culinary journey that will tantalize your taste buds and leave you craving for more. In this article, we delve into the delightful world of Homemade Honey Butter Chicken, a dish that perfectly balances sweet and savory flavors. Whether you’re a seasoned chef or a beginner in the kitchen, this recipe is sure to impress your family and friends with its unique blend of ingredients and mouthwatering taste.
Why You’ll Love This Recipe
One of the standout features of this Homemade Honey Butter Chicken recipe is its simplicity and versatility. With just a few basic ingredients, you can create a dish that is both comforting and indulgent. The succulent chicken coated in a sticky honey butter glaze is a perfect marriage of flavors that will make this recipe a regular favorite at your dining table.
Moreover, this recipe offers a delightful twist to traditional chicken dishes by incorporating the sweetness of honey and the richness of butter. It’s a perfect balance of flavors that will appeal to both kids and adults alike. Additionally, this dish can be easily customized to suit various dietary preferences, making it a versatile option for any meal.
Whether you’re looking for a quick weeknight dinner or a special dish to impress guests, Homemade Honey Butter Chicken is the perfect choice. Its crispy exterior, tender meat, and irresistible glaze make it a must-try recipe for any occasion.
So, roll up your sleeves, preheat your oven, and get ready to embark on a culinary adventure that will elevate your cooking skills and bring joy to your taste buds.
Ingredients
For this delectable Homemade Honey Butter Chicken recipe, you will need the following ingredients:
– Chicken thighs or breasts (boneless, skinless)
– Honey
– Butter
– Soy sauce
– Garlic (minced)
– Salt and pepper
– Cornstarch
– Green onions (for garnish)
Feel free to explore optional ingredient substitutions such as using maple syrup instead of honey for a different flavor profile or opting for coconut aminos as a soy sauce alternative for a gluten-free version of the dish.
Step-by-Step Instructions
1. Preheat your oven to 400°F (200°C) and line a baking sheet with parchment paper.
2. In a bowl, mix honey, melted butter, soy sauce, minced garlic, salt, and pepper to create the honey butter glaze.
3. Coat the chicken pieces in cornstarch, shaking off any excess.
4. Dip each chicken piece into the honey butter glaze, ensuring it is evenly coated.
5. Place the coated chicken on the prepared baking sheet and bake for 25-30 minutes, or until the chicken is cooked through and golden brown.
6. Garnish with sliced green onions before serving.
These simple steps will guide you through the process of creating a crispy and flavorful Homemade Honey Butter Chicken that will delight your senses and leave you wanting more.
Expert Tips for Success
For the best results, make sure to pat the chicken dry before coating it in cornstarch to ensure a crispy exterior. Additionally, baste the chicken with the honey butter glaze halfway through baking to enhance the flavor and moisture of the dish. Avoid overcrowding the chicken pieces on the baking sheet to allow them to cook evenly and achieve the desired crispiness.
If you prefer a spicier kick, you can add a dash of red pepper flakes or a sprinkle of paprika to the honey butter glaze for a flavor boost. Experiment with different herbs and spices to personalize the dish to your liking.
To keep the chicken tender and juicy, avoid overcooking it. Use a meat thermometer to ensure the internal temperature reaches 165°F (74°C) for safe consumption without drying out the meat.
Don’t forget to let the chicken rest for a few minutes after baking to allow the juices to redistribute, ensuring a more flavorful and succulent eating experience.
Variations and Substitutions
If you’re looking to switch up the flavors or cater to specific dietary needs, there are several creative variations and substitutions you can explore for this Homemade Honey Butter Chicken recipe.
– Substitute chicken with tofu or cauliflower for a vegetarian twist on the dish.
– Use agave nectar or molasses instead of honey for a different sweetness profile.
– Experiment with adding chopped nuts or sesame seeds for extra crunch and texture.
– For a dairy-free version, replace butter with coconut oil or vegan butter alternatives.
Feel free to get creative in the kitchen and adapt the recipe to suit your preferences and dietary requirements while still enjoying the delicious flavors of Homemade Honey Butter Chicken.
Serving Suggestions
To elevate the dining experience and complement the flavors of Homemade Honey Butter Chicken, consider serving the dish with steamed rice or quinoa to soak up the delectable glaze. Pair it with a side of roasted vegetables or a fresh green salad for a well-rounded meal.
For a complete feast, serve this dish alongside homemade garlic mashed potatoes, buttered corn on the cob, or a refreshing cucumber salad. Don’t forget to garnish the chicken with additional green onions or a sprinkle of sesame seeds for an added visual appeal and burst of freshness.
Whether enjoyed as a main course or as part of a larger spread, Homemade Honey Butter Chicken is a versatile dish that pairs well with various sides and accompaniments, allowing you to create a memorable dining experience for yourself and your loved ones.
FAQs
Q: Can I use bone-in chicken pieces for this recipe?
A: While boneless, skinless chicken thighs or breasts are recommended for quicker cooking and easier eating, you can certainly use bone-in chicken pieces. Just adjust the cooking time accordingly to ensure the chicken is fully cooked.
Q: Is it possible to make this dish ahead of time?
A: While Homemade Honey Butter Chicken is best enjoyed fresh out of the oven for optimal crispiness, you can prepare the honey butter glaze and marinate the chicken in advance to save time. Simply coat the chicken in the glaze before baking to maintain the desired texture and flavor.
Q: How can I store leftovers?
A: If you have any leftovers, store them in an airtight container in the refrigerator for up to 2-3 days. Reheat the chicken in the oven or toaster oven to maintain its crispiness and flavors before serving.
Q: Can I adjust the sweetness level of the honey butter glaze?
A: Absolutely! Feel free to adjust the amount of honey in the glaze to suit your taste preferences. You can also balance the sweetness with a splash of vinegar or a squeeze of lemon juice for a tangy contrast.
Final Thoughts
As you reach the end of this culinary exploration of Homemade Honey Butter Chicken, we hope you are inspired to step into the kitchen and create this delectable dish for yourself and your loved ones. With its irresistible flavors, simple preparation, and versatile nature, this recipe is a true gem that deserves a spot in your recipe collection.
Whether you’re looking to impress dinner guests, satisfy your cravings, or simply enjoy a comforting meal, Homemade Honey Butter Chicken delivers on all fronts. So, gather your ingredients, follow the steps with confidence, and savor the delightful taste of this homemade masterpiece. Bon appétit!

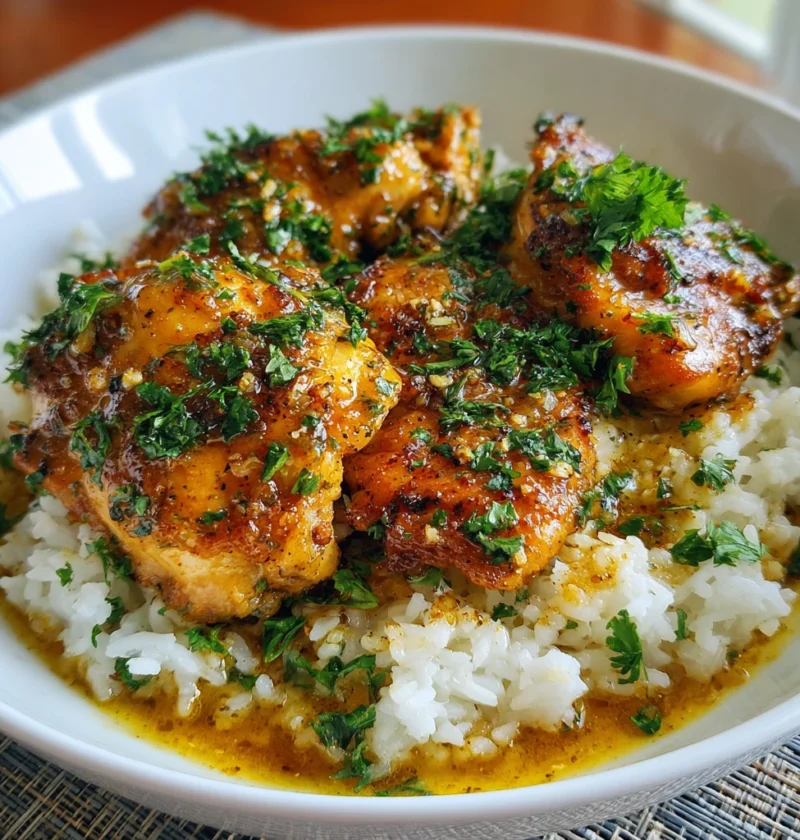
Homemade Honey Butter Chicken It’s a Must Try
Indulge in the delightful blend of sweet and savory flavors with Homemade Honey Butter Chicken. Succulent chicken pieces coated in a sticky honey butter glaze, baked to perfection, and garnished with green onions for a crispy and flavorful dish.
Ingredients
- 4 chicken thighs or breasts (boneless, skinless)
- 1/4 cup honey
- 4 tablespoons butter, melted
- 2 tablespoons soy sauce
- 2 cloves garlic, minced
- Salt and pepper to taste
- 2 tablespoons cornstarch
- 2 green onions, sliced (for garnish)
Directions
-
Preheat the oven to 400°F (200°C) and line a baking sheet with parchment paper.
-
In a bowl, mix honey, melted butter, soy sauce, minced garlic, salt, and pepper to create the honey butter glaze.
-
Coat the chicken pieces in cornstarch, shaking off any excess.
-
Dip each chicken piece into the honey butter glaze, ensuring it is evenly coated.
-
Place the coated chicken on the prepared baking sheet and bake for 25-30 minutes until cooked through and golden brown.
-
Garnish with sliced green onions before serving.